
Overview
Did you know that the cloud version of Microsoft Dynamics 365 Business Central has the ability to connect its data with the Office 365 app Microsoft Teams? Sharing data this way enables departments and entire organizations to work more efficiently and have easier access to current financial data.
Please note: Microsoft Teams only works with the cloud version of Business Central, not the on-premises version. Only select features of Business Central are available through Microsoft Teams, not the full product capabilities. These features include the ability to view Customers, Vendors, and Contacts.
Let’s learn three ways to connect Business Central and Microsoft Teams so your organization can enhance and improve workflows!
Using Microsoft Teams
Prerequisites: A Business Central online user account is required for Business Central app for teams. 2. Access to The Microsoft Teams desktop app or teams in browser – You can’t integrate with Business Central by using the Microsoft Teams mobile app. Your organization’s policies must allow you to install apps in Microsoft Teams.
1. Log into Microsoft Teams.
2. Click on the ellipses on the left-hand tool bar.
3. Type “Business Central” in the search bar.
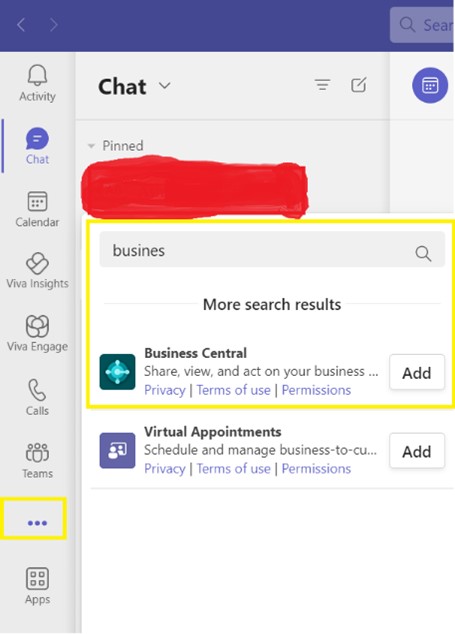
4. Click on Add. A new window will open. Click Add again.
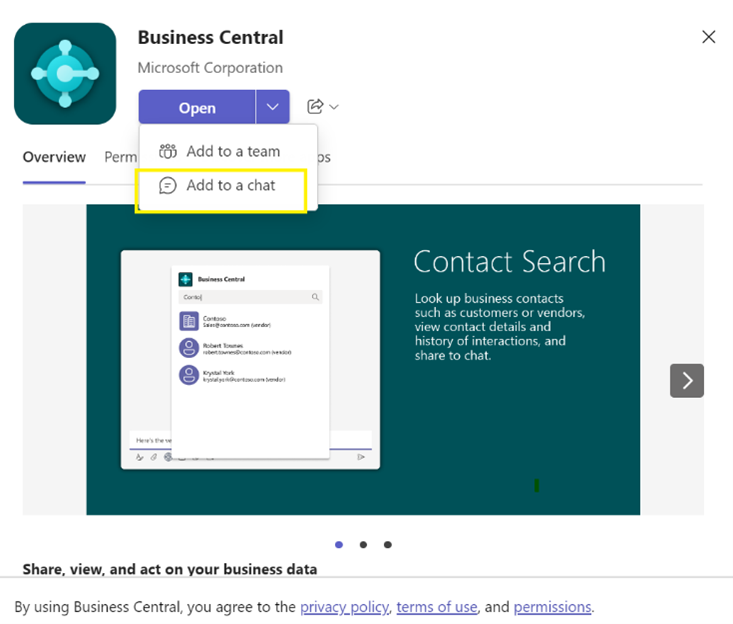
5. Once the download is complete, select “Add to a chat” from the Open dropdown. Add relevant team members to the chat and drop them a message. Now they can open the Business Central app from Microsoft Teams application!
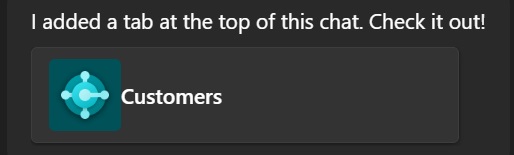
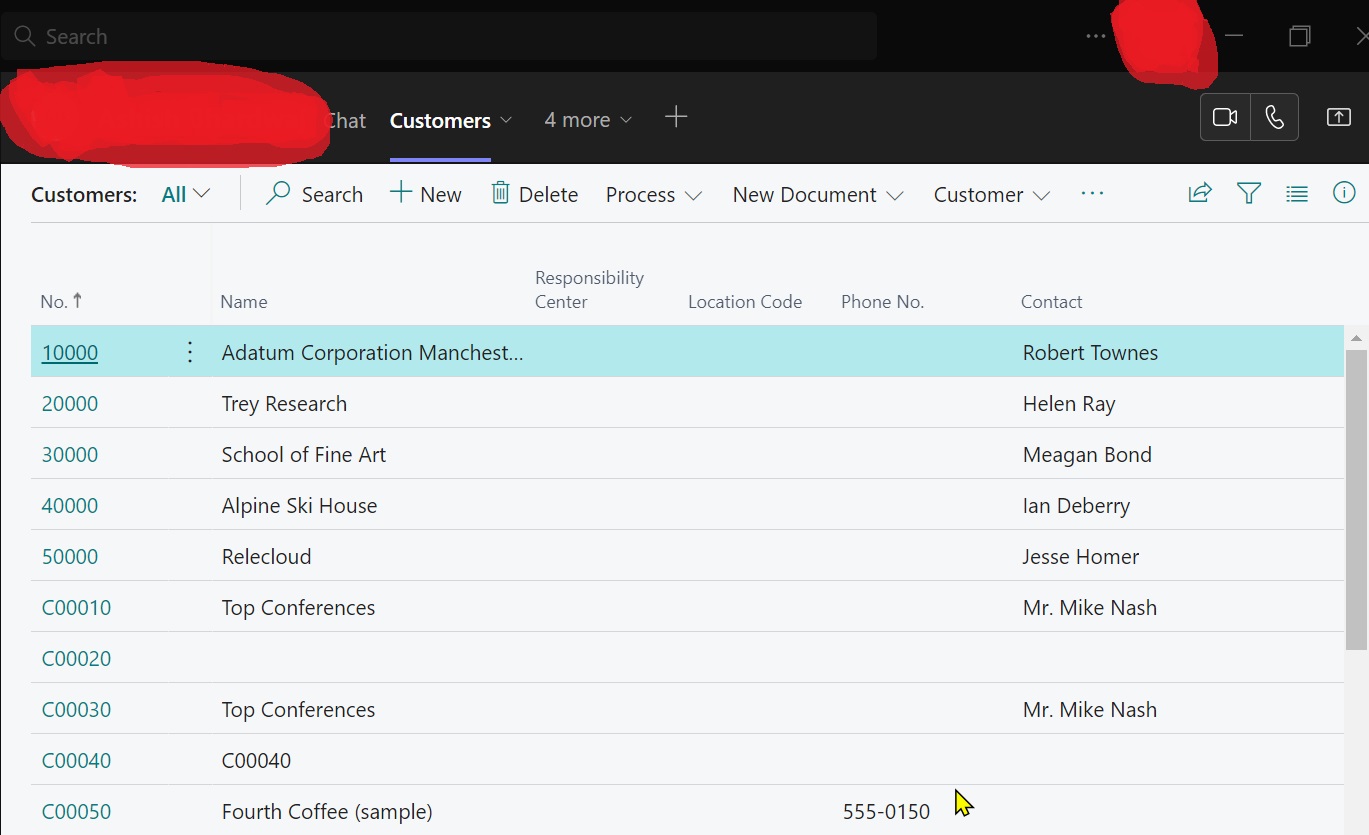
6. To view the Business Central data, click on the Customers tab of your Microsoft Teams. The results will look something like this:
Using Business Central
1. Connect to your organization’s Business Central cloud.
2. Search for the “Get the Business Central app for Teams”.
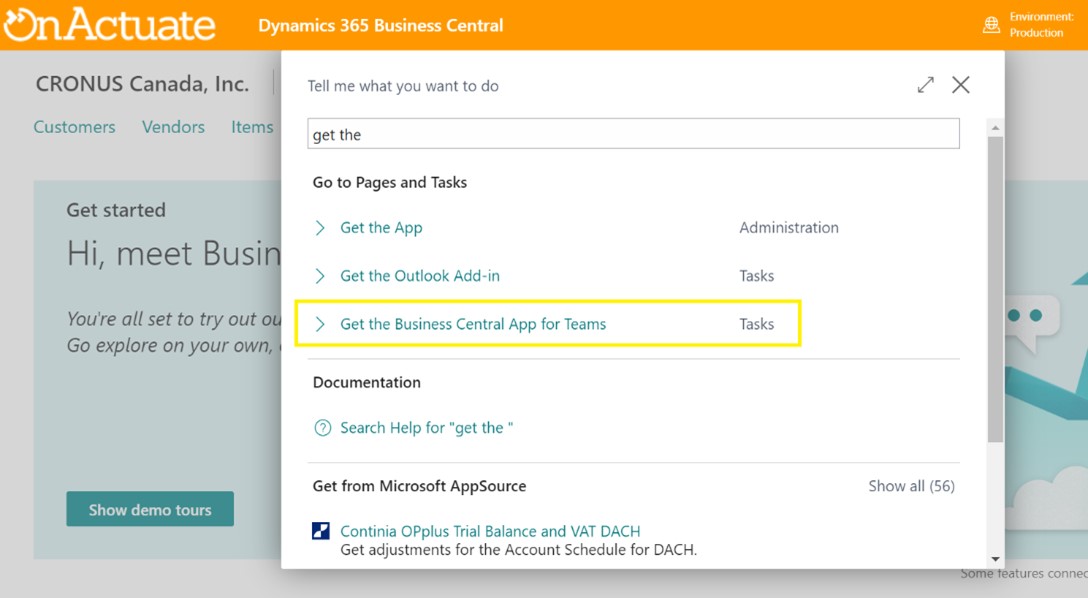
3. Download the app from the store.

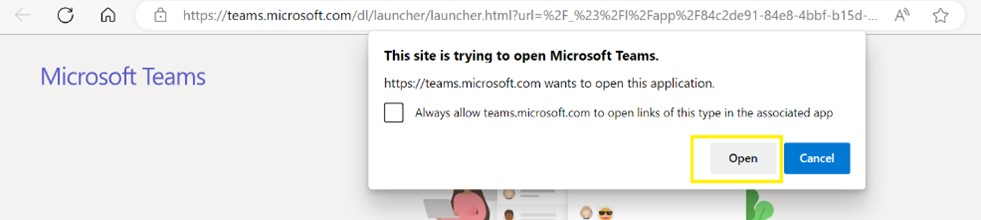
4. A new tab will open and ask for the Microsoft Teams application. Open the Microsoft Teams app.
If you don’t have admin rights, then click on “Request for approval” to get approval from your IT team.
Click on Add and follow the same process as above starting from Step 5 in the Using Microsoft Teams section.
Using the link
1. Open this link:
https://teams.microsoft.com/l/app/84c2de91-84e8-4bbf-b15d-9ef33245ad29
2. A new tab will open and ask for the Microsoft Teams application. Open the Microsoft Teams app.
If you don’t have admin rights, then click on “Request for approval” to get approval from your IT team.
3. Click on Add and follow the same process as above starting from Step 5 in the Using Microsoft Teams section.
Microsoft Dynamics 365 Business Central has many exciting features like this for businesses to improve their processes and enhance productivity.
About the expert

Ashish Kumar Bhardwaj, Business Central Technical Consultant, OnActuate
Ashish has an impressive track record of more than 7 years of hands-on experience in Microsoft technologies. He demonstrates exceptional proficiency in various aspects, including release management, diverse developments covering different modules and versions of Dynamics NAV or Business Central, report generation, customer support, and skillfully managing multiple projects. Additionally, he has earned the esteemed MB-800 certification, further validating his expertise in the field.
The “OneByte” blog series are technical how-to articles by OnActuate’s expert consultants covering Microsoft Business Applications (Microsoft Dynamics, Power Platform) and related technologies. Have a topic you’d like to learn more about? Email us at info@onactuate.com!


