
Welcome to Part 3 of our Microsoft Dynamics 365 Finance & Operations Integration Series.
After covering how to bring data into D365 through inbound integrations, we’re now focusing on the outbound side – where D365 acts as the data source, pushing information out to external systems on a recurring schedule.
In this guide, you’ll learn how to configure Recurring Batch APIs (Application Programming Interface) to export data efficiently and reliably. Whether you’re syncing to a data warehouse, third-party application, or reporting system, outbound integrations play a crucial role in building a connected, AI-ready ecosystem.
Let’s get started with automating your data exports from D365 F&O.
Step 1: Set Up the Outbound Batch Recurring API
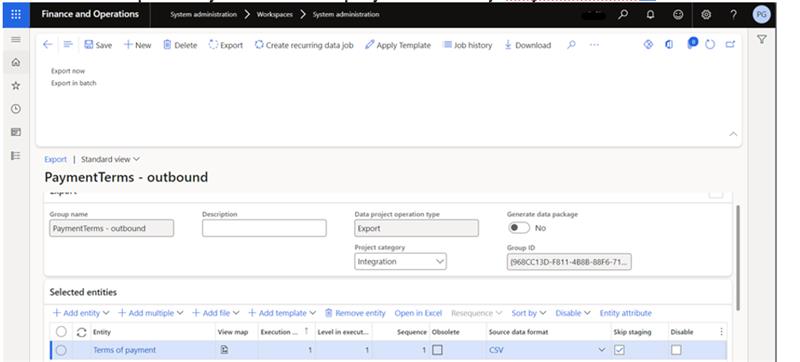
To begin your outbound integration, create an Export Project in D365 F&O.
- Navigate to Data Management > Export
- Click + New to create a new export project
- Add the “Terms of payment” entity (PaymentTermEntity) to the project
This project will be used to schedule a recurring batch job that automatically exports Data from D365 to external systems.
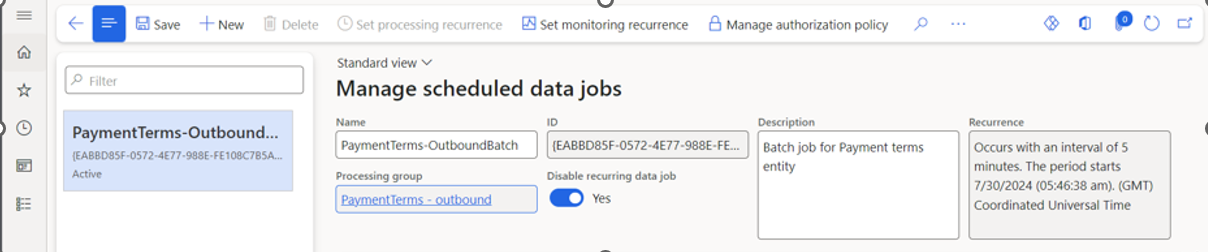
Step 2: Configure the Recurring Data Job
- Click on Create recurring data job within the export project
- Enter a name for the recurring job (e.g., PaymentTermsOutboundJob)
- Under Setup authorization policy:
- In Application ID, paste the Client ID
- Check the box to Enable the job
- Set the recurrence schedule (e.g., daily, hourly) based on how often you want data to be exported
- Click OK to save and activate the recurring batch job
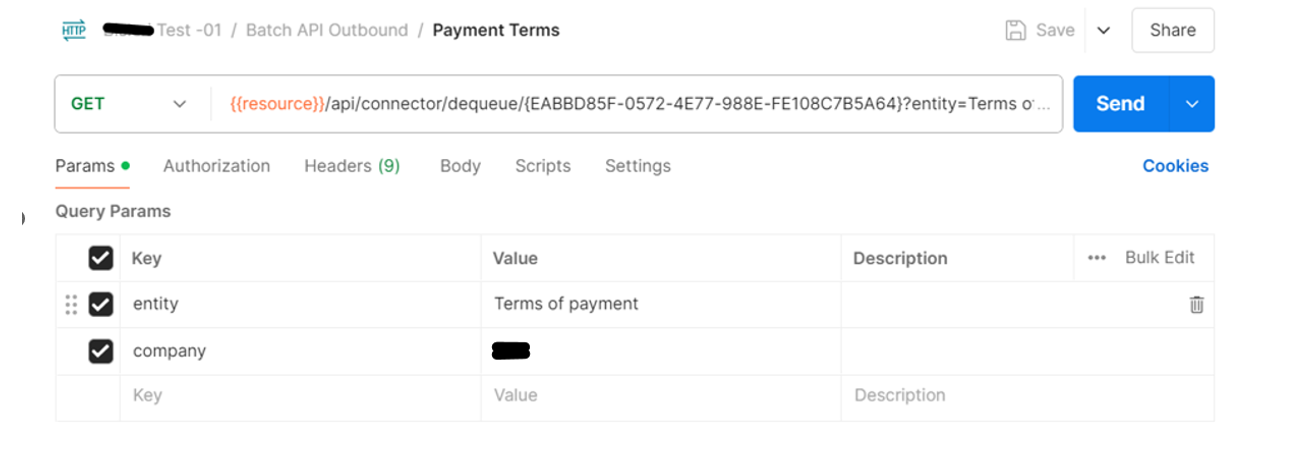
Step 3: Set Up the API for Export and Acknowledgement
To trigger and acknowledge the export job via API, use the following endpoints:
- Export API (Dequeue): https://<base URL>/api/connector/dequeue/<activity ID>
- Acknowledgement API: https://<base URL>/api/connector/ack/<activity ID>
- In Postman, create a new request
- Set the method to GET
- Name the request “Payment Terms”
- Replace <base URL> and <activity ID> with your actual environment values
- This API call retrieves the exported data and sends an acknowledgment once processed.
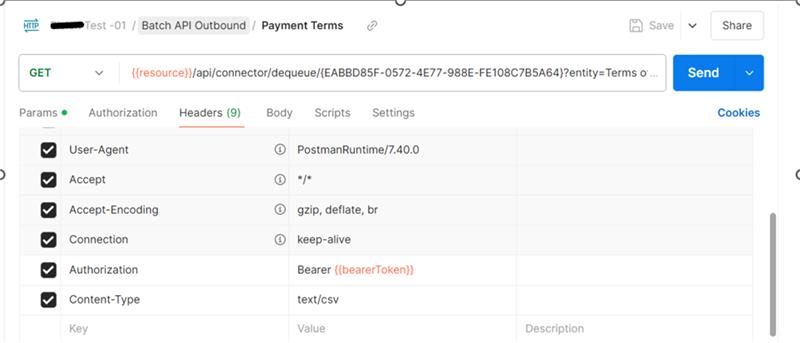
Step 4: Add Required Headers
- In your Postman request, configure the necessary headers to authenticate and communicate with the D365 F&O API.
- Headers to Add:
- Authorization
- Content Type
- The Authorization header allows access using your bearer token, while the Content-Type ensures the request is formatted correctly for the API.
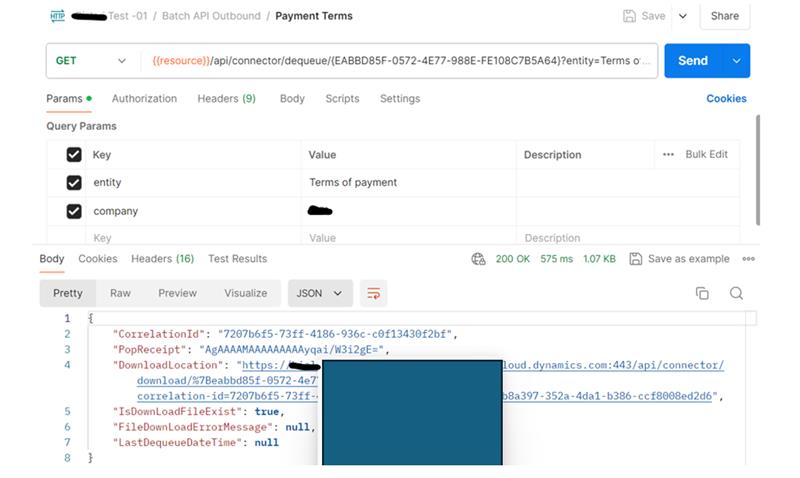
Step 5: Send the Request and Review the Response
- Click the Send button in Postman to execute the export API request
- If successful, the response will return the exported data payload along with a Message ID
This response confirms that the data has been successfully dequeued from D365 F&O and is ready for processing or storage on the external system. Make sure to store the Message ID – it will be used for tracking and acknowledgment.
Step 6: Download the Exported Data
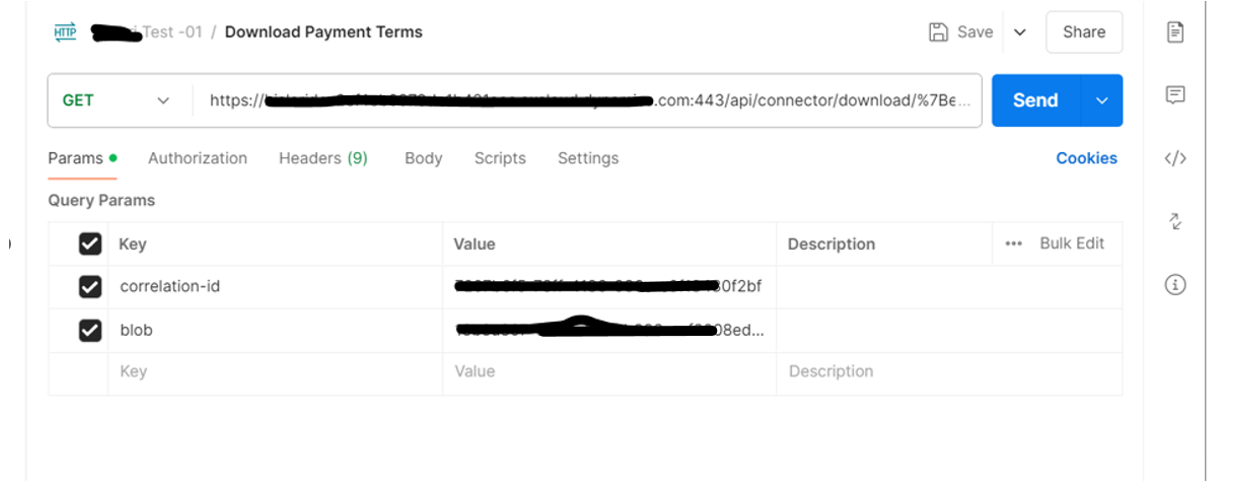
- In Postman, add a new request
- Name the request “Download PaymentTerms”
- From the previous API response, copy the DownloadLocation URL
- Paste the DownloadLocation into the URL field of your new request
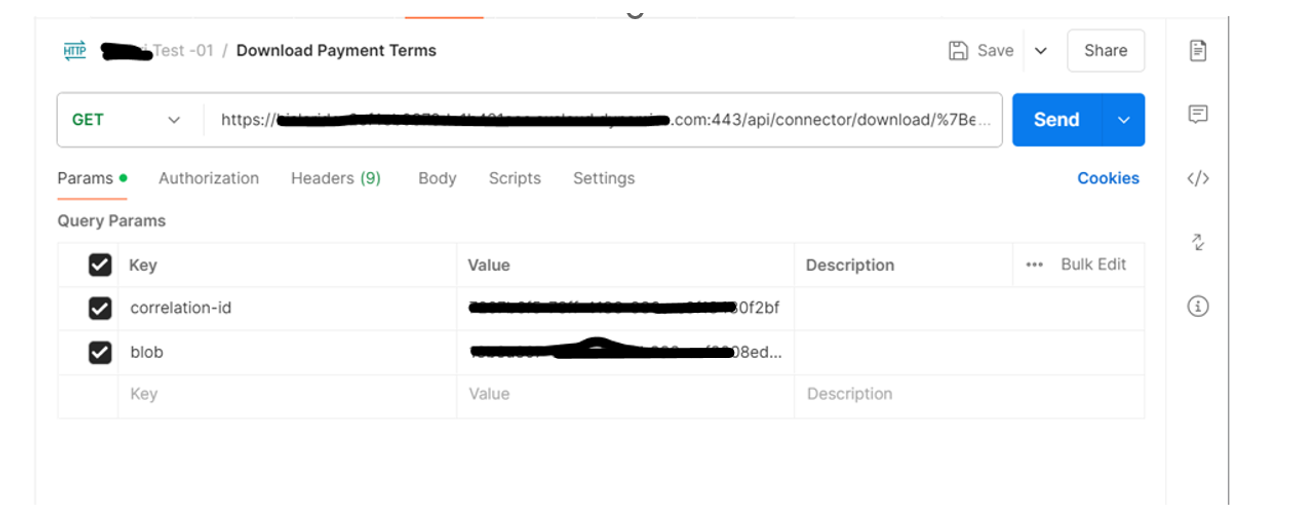
- Click the dropdown arrow next to the Send button in Postman, then select “Send and Download” to download the exported file to your system.
- Save the file as filename.zip, replacing filename with your preferred name.
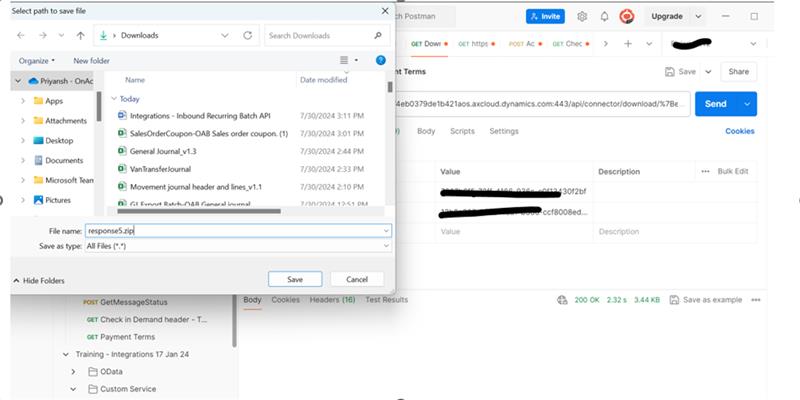
- You’ll receive the data as a ZIP file upon download.
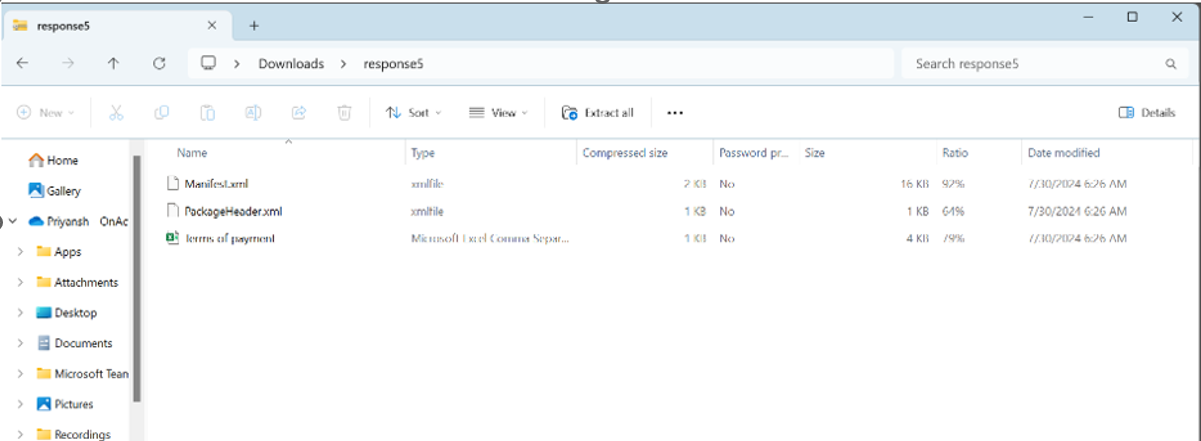
- Inside the ZIP file, open the CSV named Terms of payment.
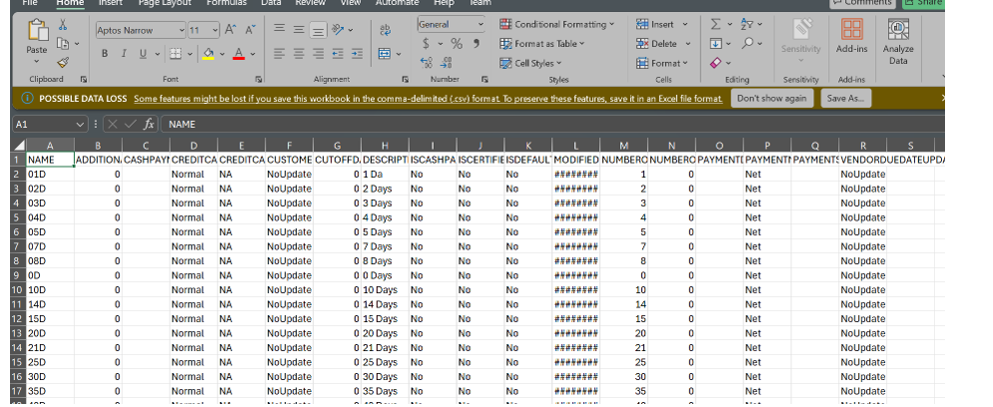
- The export process finished successfully.
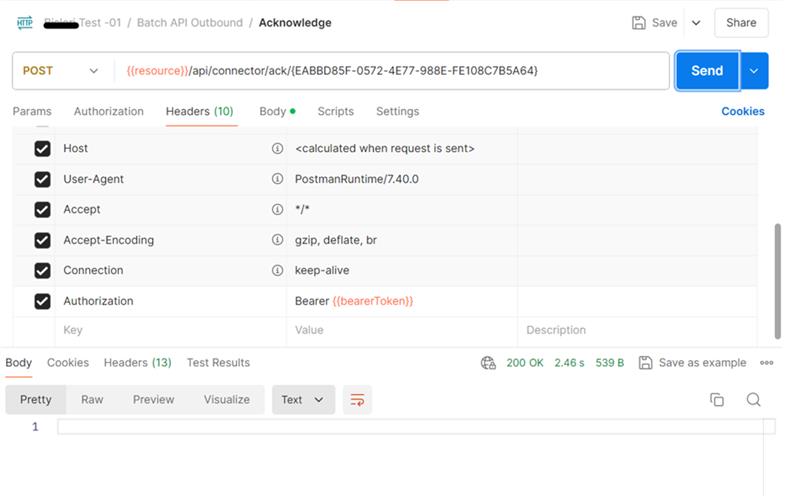
Step 7: Send Acknowledgement to D365
After the client downloads the data, an acknowledgement must be sent back to D365 to confirm that the export was received successfully. This ensures the system marks the data as processed and avoids duplicate sending.
- In Postman, add a new request
- Name the request “Acknowledge”
- Set the method to GET
- Use the following URL format:
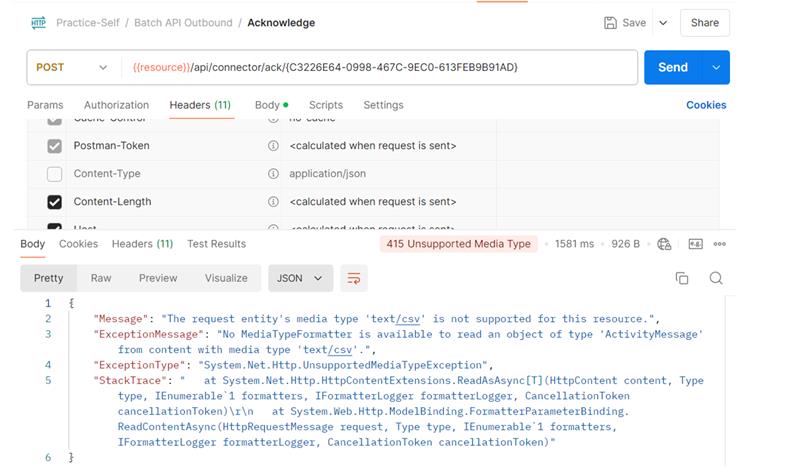
- URL: {{resource}}/api/connector/ack/{EABBD85F-0572-4E77-988E-FE108C7B5A64}

- URL: {{resource}}/api/connector/ack/{EABBD85F-0572-4E77-988E-FE108C7B5A64}
- Be sure to add the following header to the Acknowledgement API request:
Content-Type: application/json- If this header is missing or incorrectly set (e.g., Content-Type: text/csv), the API call will return an error after clicking the Send button. Using the correct content type is essential for successful acknowledgement.
Step 8: Add Required Headers
In the Acknowledgement request, add the following headers:
| Key | Value |
| Authorization | Bearer {{access_token}} |
| Content-Type | application/json |
Note: The Content-Type must be set to application/json for the acknowledgement API to work correctly.

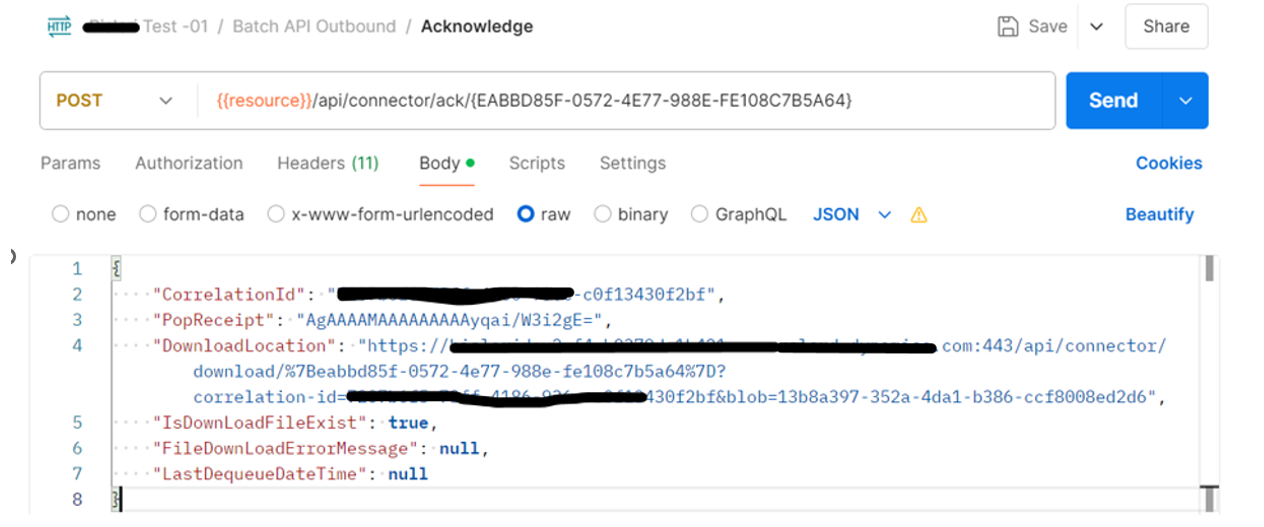
Step 9: Add the Response Payload to the Request Body
- Go to the Body tab in Postman
- Select raw as the input type
- Ensure the format is set to JSON (from the dropdown)
- Paste the full response you received from the initial Export API (dequeue request)
- This response body is required to acknowledge that the data was successfully received and processed.
- This response body is required to acknowledge that the data was successfully received and processed.
- Click send.
- The response code should be 200.
Step 10: Verify Acknowledgement Status
- After sending the acknowledgement request, check the response.
- The status should update to: Acknowledged
This confirms that all steps in the Outbound Recurring Batch API process have been completed successfully.
Automating Data Exports with Confidence
In this final part of our Dynamics 365 F&O Integration Series, we explored how to configure and run Outbound Integrations using Recurring Batch APIs. From setting up the export project and scheduling the batch job to downloading the exported data and sending acknowledgements, each step helps automate the flow of data from D365 to external systems.
By streamlining these exports, you not only reduce manual effort but also ensure your external applications are always working with the most up-to-date information – an essential step toward building AI-ready, connected business ecosystems.
With both Inbound and Outbound integrations in place, your D365 environment is now positioned to support scalable, automated, and intelligent operations across your organization.
About the expert
 |
Priyansh Gupta, Microsoft Dynamics Technical Consultant, OnActuate
Priyansh Gupta is a Microsoft Dynamics 365 Finance & Operations Technical Consultant with hands-on experience in platform customization, development, and integration. With a strong focus on streamlining business processes and enhancing user experience, Priyansh brings a practical approach to solving real-world challenges within D365 F&O. He holds the MB-500 certification in Dynamics 365 F&O development and is passionate about sharing his technical knowledge through blogging and community engagement. |
The “OneByte” blog series are technical how-to articles by OnActuate’s expert consultants covering software solutions that enhance operational efficiency, such as Microsoft Business Applications (Microsoft Dynamics, Power Platform) and Dayforce. Have a topic you would like to learn more about? Email us at info@onactuate.com!


