
In today’s fast-paced business environment, organizations are constantly seeking innovative solutions to streamline their processes and enhance productivity. Microsoft Power Apps combined with Dynamics 365 (D365) offers the ultimate solution to meet these challenges. Power Apps provides a low-code platform that allows users to create custom apps without extensive knowledge. Combining Power Apps with Dynamics 365 creates a dynamic duo that caters to both custom application needs and robust business process management.
- Custom App Development: Power Apps seamless integrates with Dynamics 365, allowing users to build custom apps tailored to specific business requirements. Whether it’s a customer-facing app or an internal tool, the flexibility of Power Apps ensures a perfect fit.
- Automated Workflows: Dynamics 365’s workflow automation capabilities can be leveraged through Power Apps. This integration enables the creation of automated processes that enhance efficiency, reduce errors, and accelerate business workflows.
- Real-time Data Sync: Power Apps and Dynamics 365 work in tandem to ensure real-time data synchronization. This ensures that the information presented in custom apps is always up–to–date, promoting accuracy across the organization.
Steps to Create a Power App
- Firstly, Navigate to make.powerapps.com
- Click Create on Home Page -> Add a blank App

Image 1: Power Apps Home Page
- Add a blank canvas App by clicking Create on Blank Canvas App
- Give your App a name
- Select Create
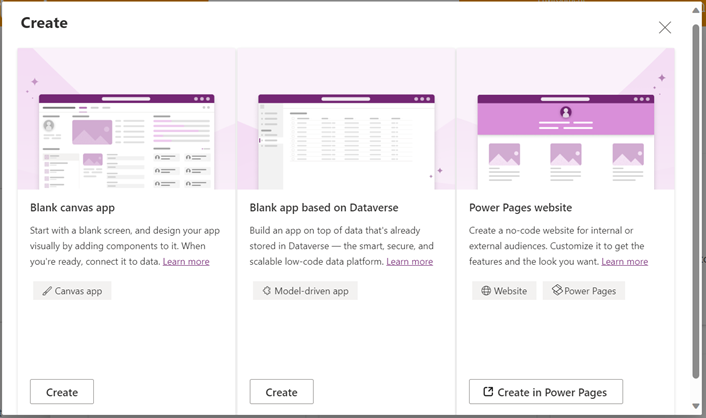
Image 2: Type of Apps
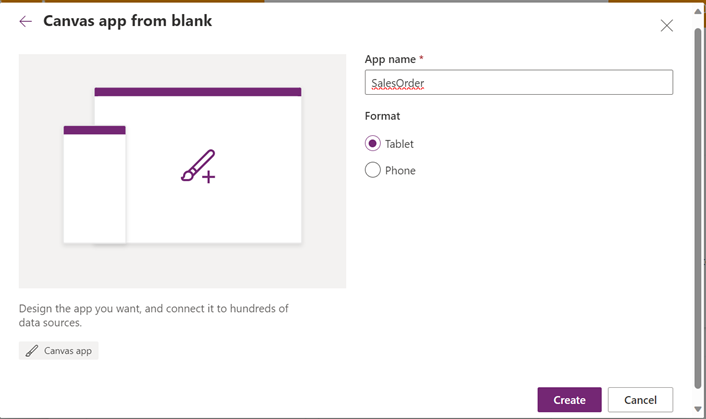
Image 3: Add App name
You can select tablet or phone as per your format preference.
For landscape orientation format of app, select Tablet and for Portrait orientation format select Phone.
Creating a connection to D365
To connect your Power App to Microsoft Dynamics 365 Finance and Operations (D365F&O):
- Click on Connections on Home Page → New Connection
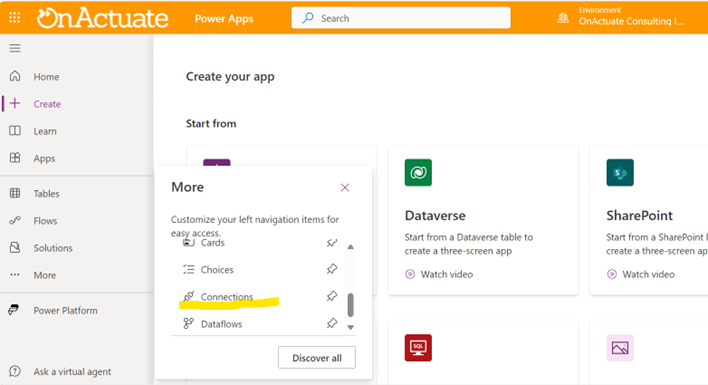
Image 4: Creating Connection
- Click on “Fin & Ops Apps (Dynamics 365)”
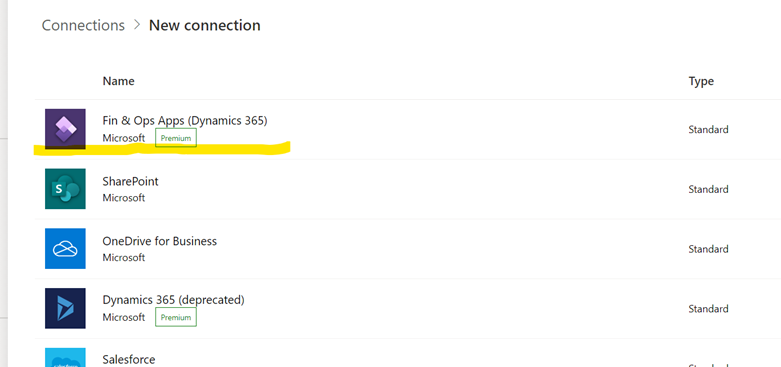
Image 5: Connect to Fin& Apps
- Enter your credentials and create a connection.
- Come back to your created App. Start adding the heading of your page.
- From the Insert options drop-down menu, we can add a rectangle, text box for typing and vertical gallery for inserting data from tables.
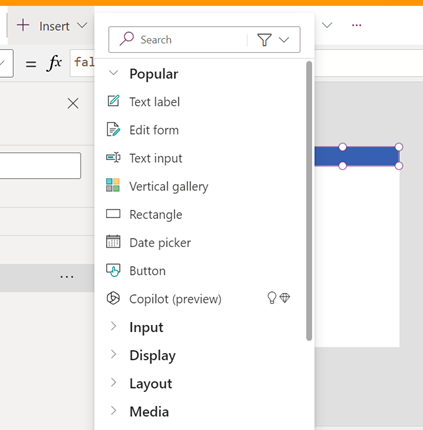
Image 6: Add objects in your App
6. Add a vertical gallery and adjust it to your page, scroll to data source in the Properties section and add a table. Choose your connector that you made before and add a dataset.
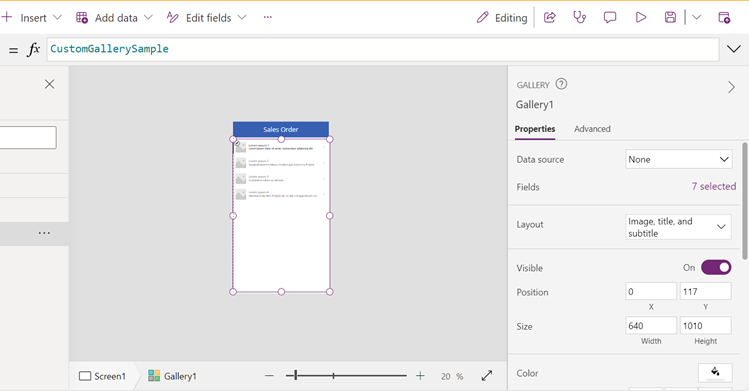
Image 7: Add vertical gallery to add Datasource
7. After adding dataset “SalesOrderHeadersV2”, it shows two fields on the page. You can change them by filtering the expression above.
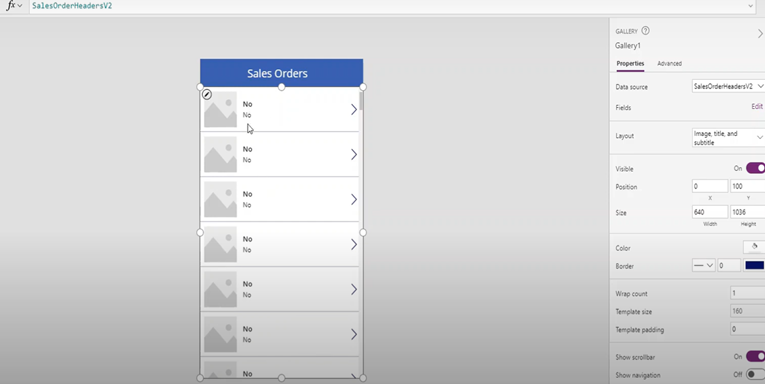
Image 8: Add fields on Page
In the expression to change field, change → fx: ThisItem.’Field Name’
For example, ThisItem.’Sales Order’ & ThisItem.’Customer account’
We can remove the image box and the arrow button if we have to make a single page App.
If we must make multiple pages, we can use the arrow button to navigate to the next page by adding Navigate(NextPageName, ScreenTransition.None) on select in Advanced Properties.
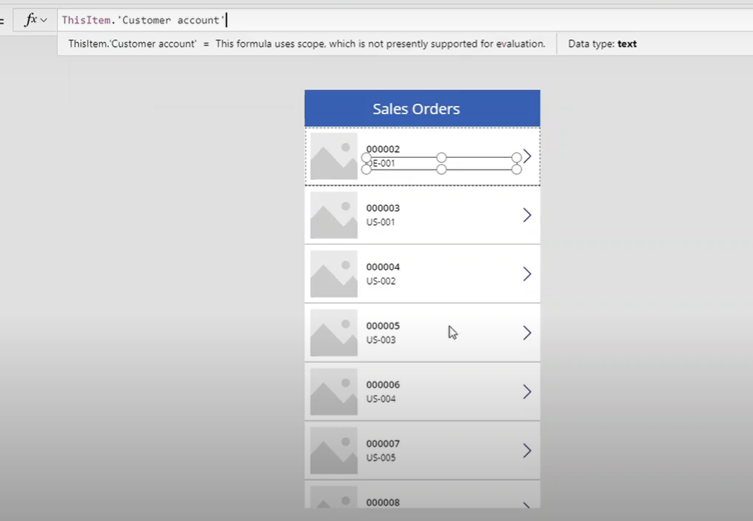
Image 9: Change fields in Vertical gallery
We can add in fx by clicking on SalesOrder Number: Concatenate(“Sales Order: “,ThisItem.SalesOrder) to display text before the sales order.
- For the next step, we need to add some criteria that will filter down the app to the specific customer.
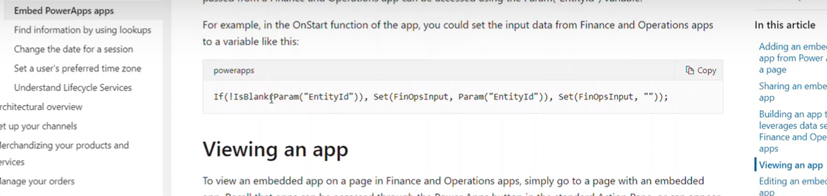
Image 10: Setting the input data from F&O apps to a variable.
Click on App on the left side and then advanced properties. Paste the if statement in the OnStart property.
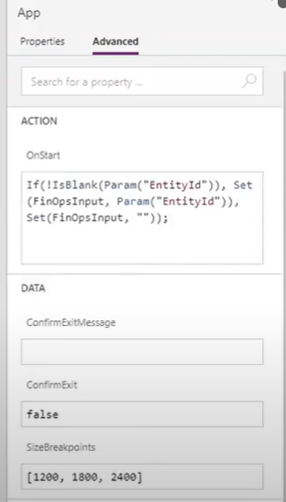
Image 11: Adding the expression in OnStart property.
This condition is checking to see if there is an entity ID being passed from D365. If there is then it is going to set a variable called FinOpsInput equal to that entity ID. If we’re running it outside of D365 we would not have this entity ID, so it would be blank and show FinOpsInput as blank.

- Save the App.
Now we will link our app to D365F&O.
- Go to the homeScreen of Power Apps and navigate to Apps to get the details of your App.
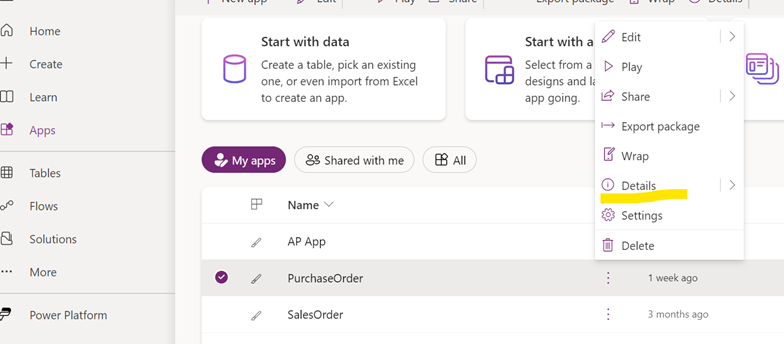
Image 12: Get the details of the App
2. Copy the App ID from the details.
Image 13: App Id of the App
3. Open D365F&O. Open all customers.
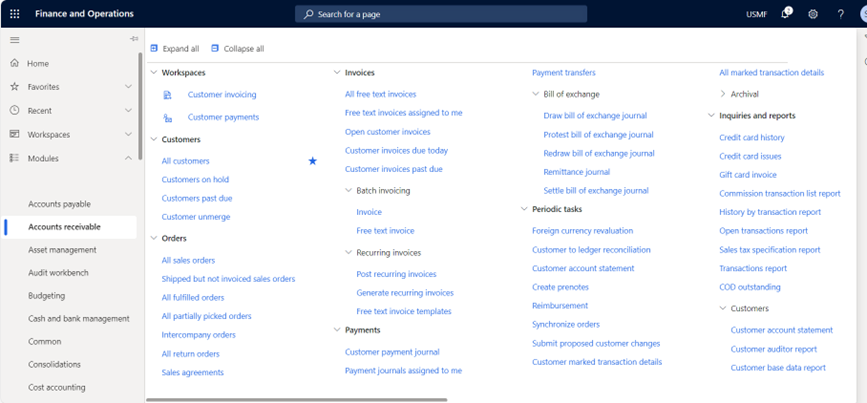
Image 14: All Customers Path
4. After opening the All Customers form, click on the Power Apps symbol in the upper right corner.

Image 15: Add an app.
5. Enter your App name and paste the App ID that was copied before, and then select the column field we used in our App of Customer. We can choose wide or thin for the application size.
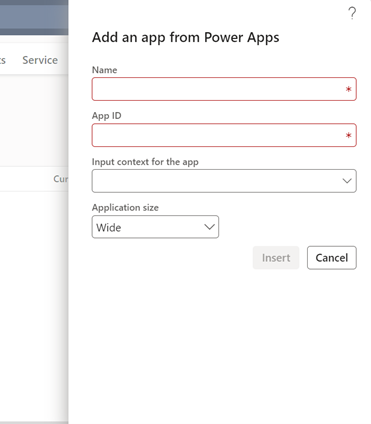
Image 16: Add details from Power Apps.
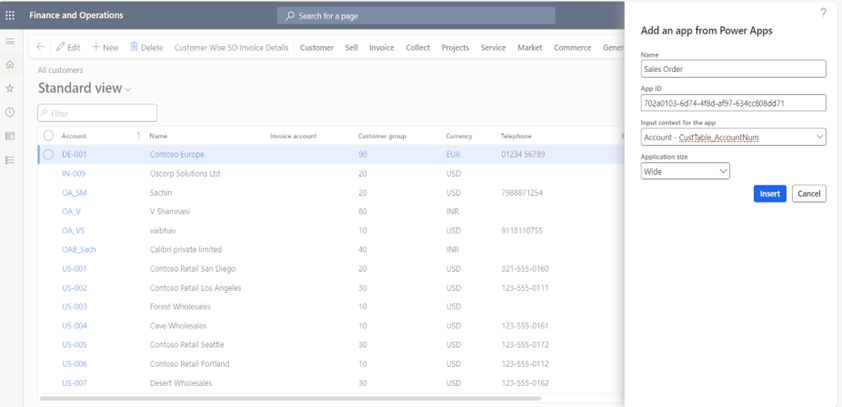
Image 17: Inserting App
6. After adding all the details, click insert.
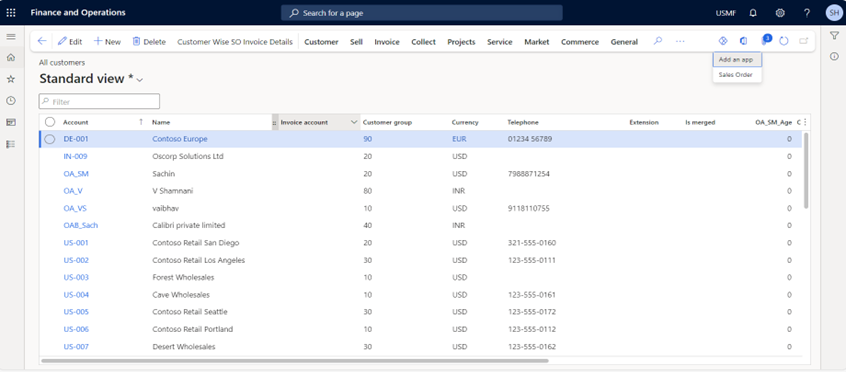
Image 18: App added
Now you can see when you click on the Power Apps icon, the Sales Order app is added. Click on Sales Order to open your App.
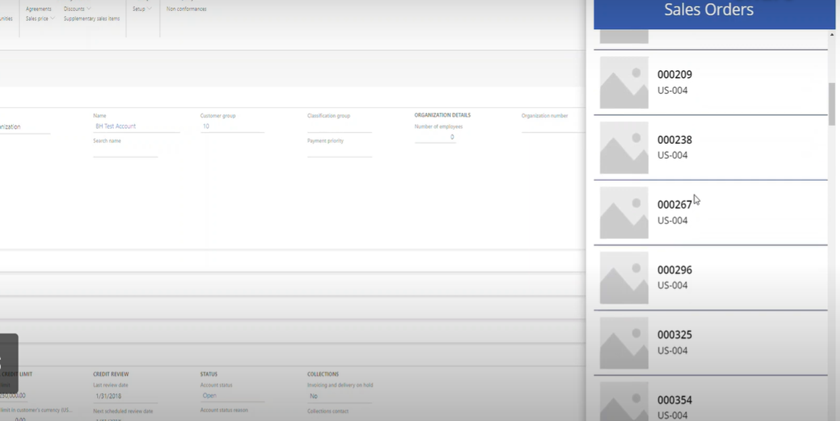
Image 19: Sales Orders App visible.
Now you can expand this App or build a new one. Overall, it’s a straightforward and simple way to create a basic App in Power Apps and link the App to D365F&O.
About the expert
 |
Shubhangani Tayal, Technical Consultant, OnActuate
Shubhangani is a Technical Consultant based out of India. Her experience includes development and customization for a variety of functionalities in D365F&O. She also is experienced in developing and customizing Power BI and SSRS reporting and its integration with D365F&O. Shubhangani is currently certified in MB-500: Microsoft Dynamics 365: Finance Operations Apps Developer, AZ-900: Microsoft Azure Fundamentals and MB-330 Supply Chain Management. |
The “OneByte” blog series are technical how-to articles by OnActuate’s expert consultants covering Microsoft Business Applications (Microsoft Dynamics, Power Platform) and related technologies. Have a topic you’d like to learn more about? Email us at info@onactuate.com!


